- Thank you received: 0
Mro--First Looks
18 years 3 months ago #18959
by rderosa
Replied by rderosa on topic Reply from Richard DeRosa
<blockquote id="quote"><font size="2" face="Verdana, Arial, Helvetica" id="quote">quote:<hr height="1" noshade id="quote"><i>Originally posted by neilderosa</i>
<br />If you wish to attempt it, you will need a photo shop program able to handle it. Since I'm no expert, I suggest you consult the manufacturer before attempting. <hr height="1" noshade id="quote"></blockquote id="quote"></font id="quote">I had tried manipulating the Full Res (304MB) Nili Fossae myself about a week ago. After I downloaded it, I tried opening it in Corel Paint Shop Pro, and it never succeeded in opening. I thought it might be a memory issue. I called Corel and the tech support guy told me he had someone call who was complaining about a 100MB image, so this was the biggest he heard about. He wasn't sure if it was memory or their software.
I decided to upgrade my computer to the maximum 2GB, which I just did today. Now, I can open the file in Paint Shop, but as soon as I stick the Crop tool on it, the software crashes. Actually, occasionally I can do a crop, but the next time I try to use the file, it's corrupted, and I have to download it again.
So, I decided to see if I could get someone who's posting the images at the Lunar and Planetary Labs at The University of Arizona, to see if I could suggest making some smaller crops before they posted the Full Res image. It took me about 5 phone calls, but eventually I got someone who is actually working on the project.
www.lpl.arizona.edu/
The bottom line is that they know about the problem, they have the same problem themselves, and they are working diligently on a solution. They plan on converting the larger ones (if not all) to JP2 format, which works sort of like the way the Zoomify tool works (only much more sophisticated), where you can zoom in on parts of the full res image, and then save smaller pieces of it. JP2 would require a plugin, but that shouldn't be a problem.
They are very motivated to get it right, and figure it should be available over the coming months. He told me there are problems with the idea of just breaking the posted image into smaller pieces.
The good news? Now I have 2GB memory.[ ]
]
rd
<br />If you wish to attempt it, you will need a photo shop program able to handle it. Since I'm no expert, I suggest you consult the manufacturer before attempting. <hr height="1" noshade id="quote"></blockquote id="quote"></font id="quote">I had tried manipulating the Full Res (304MB) Nili Fossae myself about a week ago. After I downloaded it, I tried opening it in Corel Paint Shop Pro, and it never succeeded in opening. I thought it might be a memory issue. I called Corel and the tech support guy told me he had someone call who was complaining about a 100MB image, so this was the biggest he heard about. He wasn't sure if it was memory or their software.
I decided to upgrade my computer to the maximum 2GB, which I just did today. Now, I can open the file in Paint Shop, but as soon as I stick the Crop tool on it, the software crashes. Actually, occasionally I can do a crop, but the next time I try to use the file, it's corrupted, and I have to download it again.
So, I decided to see if I could get someone who's posting the images at the Lunar and Planetary Labs at The University of Arizona, to see if I could suggest making some smaller crops before they posted the Full Res image. It took me about 5 phone calls, but eventually I got someone who is actually working on the project.
www.lpl.arizona.edu/
The bottom line is that they know about the problem, they have the same problem themselves, and they are working diligently on a solution. They plan on converting the larger ones (if not all) to JP2 format, which works sort of like the way the Zoomify tool works (only much more sophisticated), where you can zoom in on parts of the full res image, and then save smaller pieces of it. JP2 would require a plugin, but that shouldn't be a problem.
They are very motivated to get it right, and figure it should be available over the coming months. He told me there are problems with the idea of just breaking the posted image into smaller pieces.
The good news? Now I have 2GB memory.[
rd
Please Log in or Create an account to join the conversation.
- neilderosa
-
- Offline
- Platinum Member
-

Less
More
- Thank you received: 0
18 years 3 months ago #19140
by neilderosa
Replied by neilderosa on topic Reply from Neil DeRosa
<blockquote id="quote"><font size="2" face="Verdana, Arial, Helvetica" id="quote">quote:<hr height="1" noshade id="quote">I had tried manipulating the Full Res (304MB) Nili Fossae myself about a week ago. After I downloaded it, I tried opening it in Corel Paint Shop Pro, and it never succeeded in opening. I thought it might be a memory issue. I called Corel and the tech support guy told me he had someone call who was complaining about a 100MB image, so this was the biggest he heard about. He wasn't sure if it was memory or their software.[rd]
<hr height="1" noshade id="quote"></blockquote id="quote"></font id="quote">
Here's how I did it for what it's worth. Remember, I'm a low-tech guy so this is a low-tech explanation
I downloaded the 304mb image into My Pictures. I knew my computer had enough memory to handle it so that wasn't the problem; it just took time, about an hour for my DSL hook up. Hint, make sure your computer isn't set to hibernate (go to screen saver) during that amount of inactive time, otherwise you'll have to start all over, as I did a couple of times.
After that I tried to open the image with Corel Paint Shop Pro X. When I saw that didn't work, I opened it with Microsoft Office Picture Manager, which I knew, opens differently from Corel. Picture Manager uses less memory when the image is zoomed out, but it doesn't take much magnification (maybe 5 percent) to chose a subject to crop. Once chosen, I cropped the small image (face) and clicked OK. That gave me a small face at about 25 percent magnification, (more or less), which utilizes relatively little memory, but has full original detail for that small area. This would not work with big faces, (not enough memory capacity), only small ones.
There's more to it, and some trial and error, which I won't bore you with. The bottom line was when I had a small cropped face with the full original detail, I could now open it with Corel to manipulate it.
One more thing, to get bigger context images, HIRISE has a "Browser" version of the image you can use to locate targets. Once a target (subject face) is located, you have to go to the full resolution image (304mb) to see the detail.
I hope that’s clear enough. Like I said, there’s more to it. It isn’t straightforward saving the Picture Manager croppings either. You have to tweak them, which I’ll explain to anyone who wants to know.
Neil
Please Log in or Create an account to join the conversation.
18 years 3 months ago #17853
by rderosa
Replied by rderosa on topic Reply from Richard DeRosa
<blockquote id="quote"><font size="2" face="Verdana, Arial, Helvetica" id="quote">quote:<hr height="1" noshade id="quote"><i>Originally posted by neilderosa</i>
<br />Here's how I did it for what it's worth. Remember, I'm a low-tech guy so this is a low-tech explanation<hr height="1" noshade id="quote"></blockquote id="quote"></font id="quote">This is all obvious. Yes, that's the procedure. Most users are going to go through just about what you described as a matter of course. I did that two weeks ago, and actually had a high res image of that Face 1, but that wasn't the point.
Did you read the part about the University of Arizona people? How they know the files are unwieldy, and what they're planning on doing? That was the point of the message.
I would assume anybody who was interested would have gone through the kinds of steps you described. That's pretty basic.
rd
Please Log in or Create an account to join the conversation.
- neilderosa
-
- Offline
- Platinum Member
-

Less
More
- Thank you received: 0
18 years 3 months ago #19028
by neilderosa
Replied by neilderosa on topic Reply from Neil DeRosa
While I am waiting for more and better images I can use, I'll post what I have if I think they fit into the "Artificial Structures on Mars" head. As I have said before, all faces and possible artifacts don't have the same (qualitative) degree of certainty, but I'll continue to present what I have, if I think the object shows some promise of adding to the overall artificiality picture.
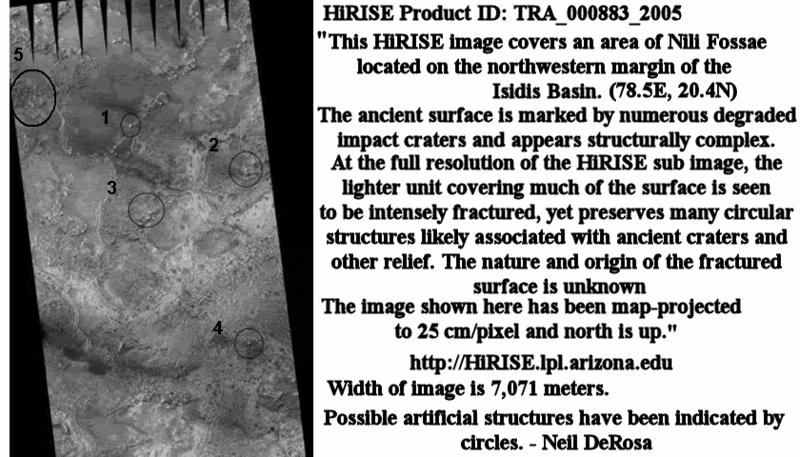
First the context image with face # 5 added.
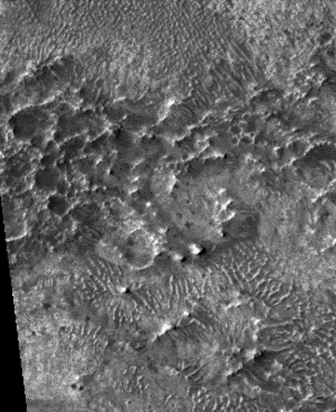
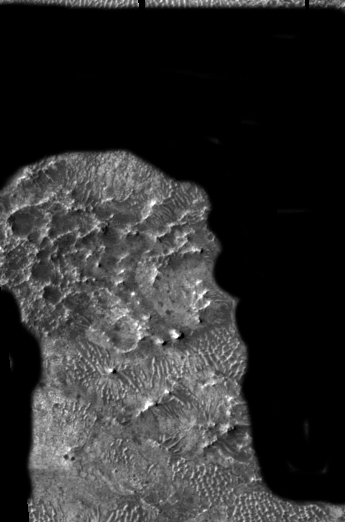
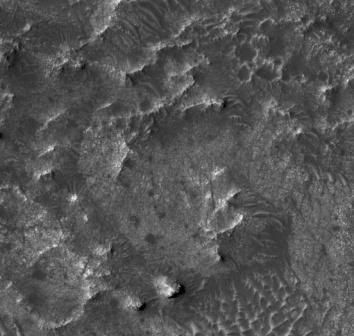
Here is face # 5 found in the 304mb Nili Fossae image.
Key for # 5
# 5 close-up. Face is around 800-1000 meters wide and does not seem to be a raised relief sculpture, as are 2 and 3. Note small face on outcropping by 5’s “chin.”
Here is the small face; note eye detail similar to face # 1 posted previously.
Please Log in or Create an account to join the conversation.
- neilderosa
-
- Offline
- Platinum Member
-

Less
More
- Thank you received: 0
18 years 1 month ago #19287
by neilderosa
Replied by neilderosa on topic Reply from Neil DeRosa
Two items; first there are many more HiRise images to study; available at link.
hiroc.lpl.arizona.edu/images/
In connection with this, the "Zoomify" function allows the viewer to easily see some of the faces we have already looked at in this thread, without downloading the full resolution images.
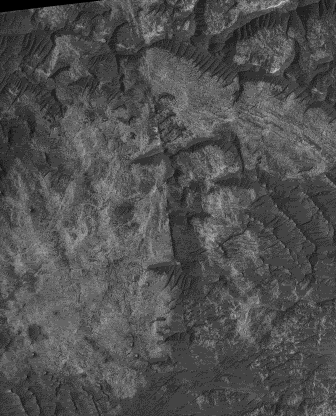
Second item: I examined PSP001377-1685 Melas Chasma, to search for artificial structures. I found no faces, but there is something interesting that's worth noting. The "face" below looked promising from a “distance” but had little detail. When I zoomed in on it there was no “face” detail at all so I would have classified it as pareidolia, except for one thing. There is an exceptionally straight line running north and south through it. My first thought was that it must be the seam-line between adjoining patched images from the HiRISE project. In other words, I thought the straight line must be in the image but not really on Mars.
Here’s PSP001377-1685 Melas Chasma, Straight Line. (reduced version)
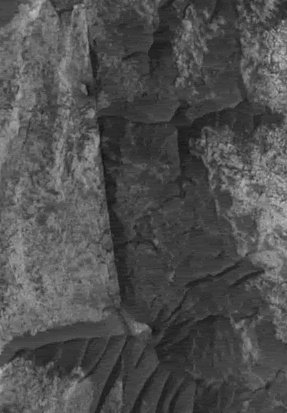
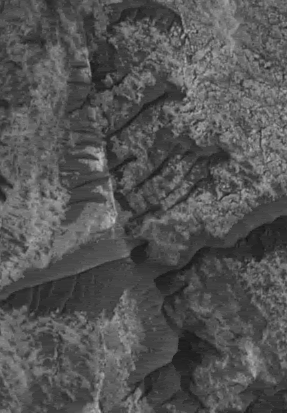
But when I cropped sections of the hi-res image and enlarged them, I could see that the line is “on the ground.” Note the formations that cross it in places. Also note the angular, raised relief along most of the line, as evidenced by the shadow cast. Remember, as someone said, this is the way it would look hovering right over the object, so we can't blame lack of resolution for the appearance of a straight line.
Section 1 (bottom)
Section 2 (middle)
Section 3 (upper)
Neil
Please Log in or Create an account to join the conversation.
- neilderosa
-
- Offline
- Platinum Member
-

Less
More
- Thank you received: 0
18 years 1 month ago #18578
by neilderosa
Replied by neilderosa on topic Reply from Neil DeRosa
Here is an MRO HiRISE - MGS MOC comparison in two images of the same area of East Condor Chasma. There is nothing very compelling as faces go here, but I'll post what I found in due course. But first we'll look at the comparison. (Almost all posted images are compressed versions of the originals, unless already small enough to fit into this format.)
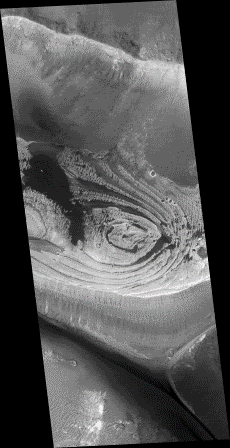
R090174 East Candor Chasma, image center is at 69.5°W 6.35°S, size 3.30 x 8.28 km, resolution 1.61 m/p. Thus this is very high resolution image for the MOC.
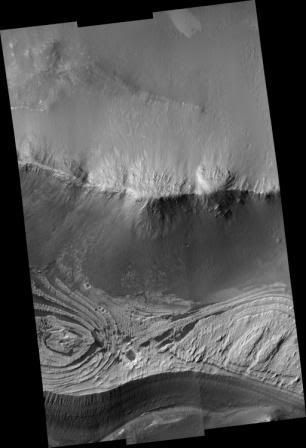
PSP001390-1735 East Candor Chasma, image center 69.2°W 6.2°S, size 6.35 x 9.3 km, resolution .25 m/p in the map projected image, though sections if the image range from .25 to 1.0 m/p. In practice, this means that at 100% enlargement some sections will be crystal clear and others less so. Note that on the (viewer's) left of this image is the same landform seen in R09.
(to be continued)
Please Log in or Create an account to join the conversation.
Time to create page: 0.283 seconds

